The Excdev Softether Adapter app is a free application that supports the Softether VPN protocol. Follow this step-by-step guide to connect effortlessly to any VPN server using this protocol, provided you have the necessary credentials. This tutorial will help you set up the app correctly, ensuring your browsing activities are secure and your online privacy is protected.
Note: If you do not yet have an active VPN subscription to use with this app, you can order one through plans & pricing page.
Download and install the Excdev Softether Adapter app on your device. The app is completely free and available for iOS, iPadOS, macOS, and Android:
Once installed, open the app to begin the configuration process.
Step 2: Add a New Profile
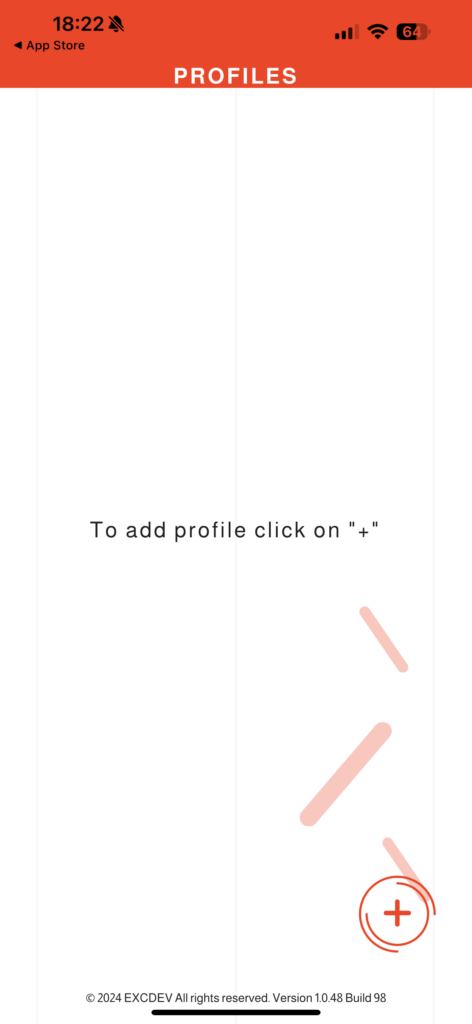
Tap on the “+” button located in the bottom-right corner of the screen to create a new VPN profile.
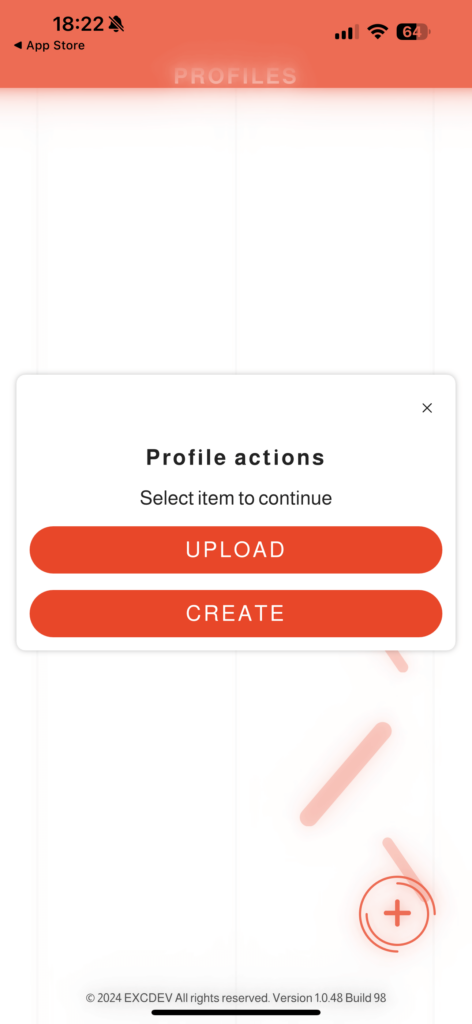
A pop-up will appear with two options: Upload or Create. Select Create to manually input your VPN configuration details.
Tap on the “+” button located in the bottom-right corner of the screen to create a new VPN profile.
A pop-up will appear with two options: Upload or Create. Select Create to manually input your VPN configuration details.
Step 3: Configure the Profile Settings
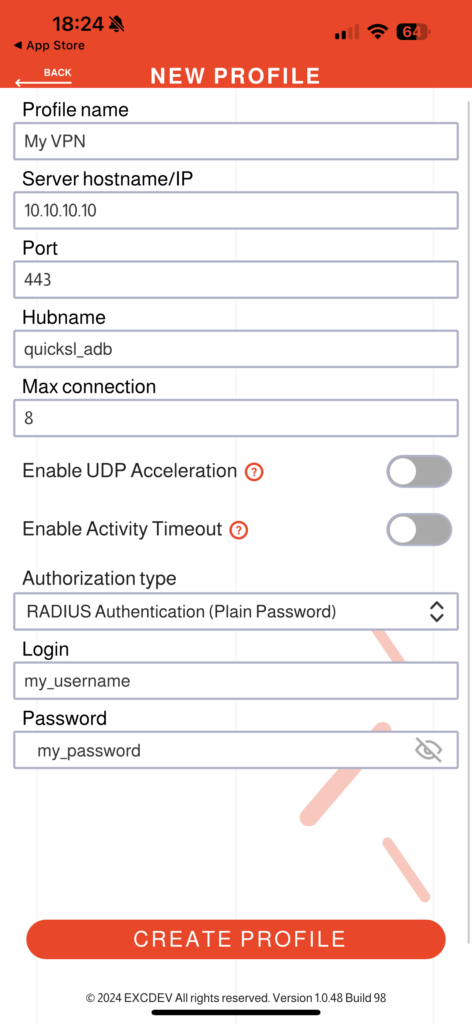
You will now be directed to the profile setup page. Fill in the following fields:
Profile name: Choose a name for your profile (e.g., “My VPN”).
Server hostname/IP: Enter the server IP address provided by OBFUSGATED. Important: Obtain the correct IP address from “Connect to VPN” page (select the country you want to connect to and copy the IP address).
Port: Input 443. This is the standard port for the Softether protocol because it mirrors the HTTPS protocol, which uses this port to ensure low visibility and make detection more difficult.
Hub name: Enter the hub name provided by OBFUSGATED. Note that hub names ending in _adbinclude ad-blocking features, which enhance security and privacy. These are recommended.
Max connection: Set this value to 8. The actual number of connections will be automatically adjusted based on your VPN plan. A higher number of connections can improve connection speed.
Step 4: Set Authentication Method
Under Authorization type, select RADIUS Authentication (Plain Password) from the dropdown menu.
Enter your Username and Password as provided by OBFUSGATED. These credentials can also be obtained from the “Connect to VPN” page.
Step 5: Additional Options
Enable UDP acceleration: Ensure this option remains disabled. UDP acceleration is turned off on the server to enhance stealthy obfuscation by mimicking HTTPS traffic, which uses TCP only and does not rely on UDP.
Enable Activity Timeout: This setting manages the balance between connection stability and battery usage. Enabling the ‘Activity Timeout’ reduces battery usage at the cost of connection stability during background operations, while disabling it improves connection stability but increases battery consumption.
Step 6: Save and Connect
Once all fields are filled, tap Create Profile to save your configuration.
Toggle the switch next to your profile to establish the VPN connection.
Once all fields are filled, tap Create Profile to save your configuration.
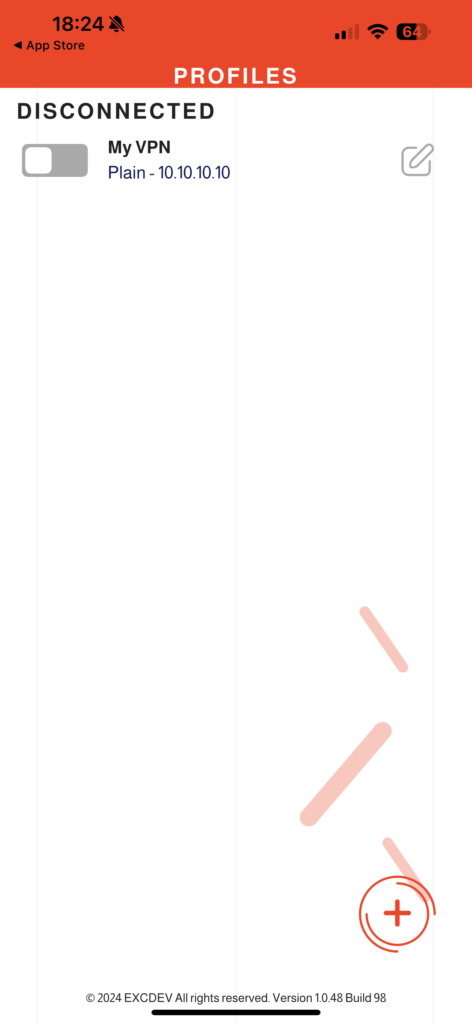
Return to the main screen, where your newly created profile will appear under the “Disconnected” section.
Toggle the switch next to your profile to establish the VPN connection.
Step 7: Verify the Connection
Verify that the app displays ‘Connected.’ Then, visit the IP check page to confirm you are connected to a remote VPN server by ensuring your IP address has been changed to the server’s address.
When connected, you gain the unique advantages of SoftEther’s low-visibility, HTTPS-like VPN protocol. This advanced protocol is designed to be hard to detect and block, ensuring a more reliable and stealthy online experience. Additionally, it provides encryption for your data, privacy protection for your browsing activity, the ability to change your location to access restricted content, and enhanced security for your internet usage.
FAQ
The Excdev Softether Adapter is a free application that supports the SoftEther VPN protocol, available for iOS, iPadOS, macOS, and Android devices. It provides secure and private internet connections by mimicking HTTPS traffic, making it difficult to detect and block VPN usage.
You can download the Excdev Softether Adapter for free from the App Store for iOS, iPadOS, and macOS devices, or from Google Play for Android devices. Simply search for "Excdev Softether Adapter" in the respective app store, download, and install the app on your device.
To set up a VPN profile, open the Excdev Softether Adapter app, tap the "+" button to create a new profile, and manually enter your VPN details such as profile name, server IP, port 443, and hub name. After configuring authentication with your username and password, save the profile and toggle the switch to connect.
Using SoftEther VPN with the Excdev Softether Adapter offers enhanced security through robust encryption, ensures low visibility by mimicking HTTPS traffic, protects your online privacy, allows access to geo-restricted content, and provides a reliable and stable connection even in restrictive environments.
If you experience connection issues, verify that your VPN credentials are correct, ensure the server IP and hub name are accurately entered, and confirm that the port is set to 443. Additionally, check your internet connection, disable UDP acceleration, restart the app, and make sure you have the latest version installed. If problems persist, contact your VPN provider’s support for assistance.